Software Guide, Reviews & Download for Windows OS
SoftGets provides Windows Latest News, how to articles & Free Software download.
SoftGets provides Windows Latest News, how to articles & Free Software download.
SoftGets provides Windows Latest News, how to articles & Free Software download.
Way back from earlier versions of Windows, Microsoft provided updates time by time. The same goes for Windows 7. You will receive the update time after time, and you are sort of compelled to install all of them. As these updates will fix bugs and make your system secure.
While some of the updates are big in size, most of them are quite small. Small updates are around 1-15 MB in size whereas major updates are around 150-300 MB in size. Update sizes are totally dependable on why the updates are provided.
If the updates are for small bug fixes, then it will be small in size too. However; if Microsoft wants to provide new features or tools then the update will be bigger.
No matter which one it is, you are compelled to update your system, if you want to experience an improved version of your Windows OS.
On installing Windows 7 on your PC, you will be asked for Windows Update. It is recommended to use the Automatic option to choose for downloading and installing Windows updates. However; there are some who have disabled the Auto-update which is not a bad thing at all.
The only drawback with choosing this option is not getting enough information about Windows Updates. To get Windows Updates, you will need to check the Windows 7 updates manually.
For manually checking Windows 7 Updates, you are going to follow these methods. We have provided a way to update your Windows 7. If you got any sort of error, then you will scroll down and use the methods to fix them.
Begin this method by opening the Start menu. Inside the Start menu, you will find a search bar. Here you are going to type “Windows Update” and press Enter.
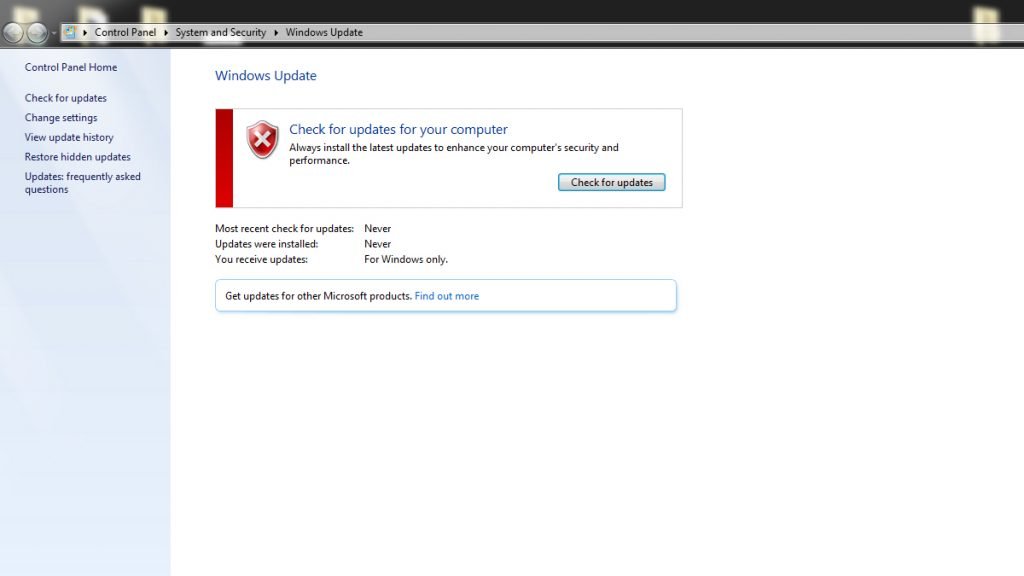
This way, you will be navigated to the Windows Update window. Now that you are in the Windows Update window, you will check for any updates.
To check for updates, you will click on Check for update button. You can also find the exact same option on the left panel of your window. Click on Check for update (either the button or the option from the left pane) and your will system will check for any Windows Update.
After checking for updates, you will be asked for downloading them. Download the Windows Updates asked.

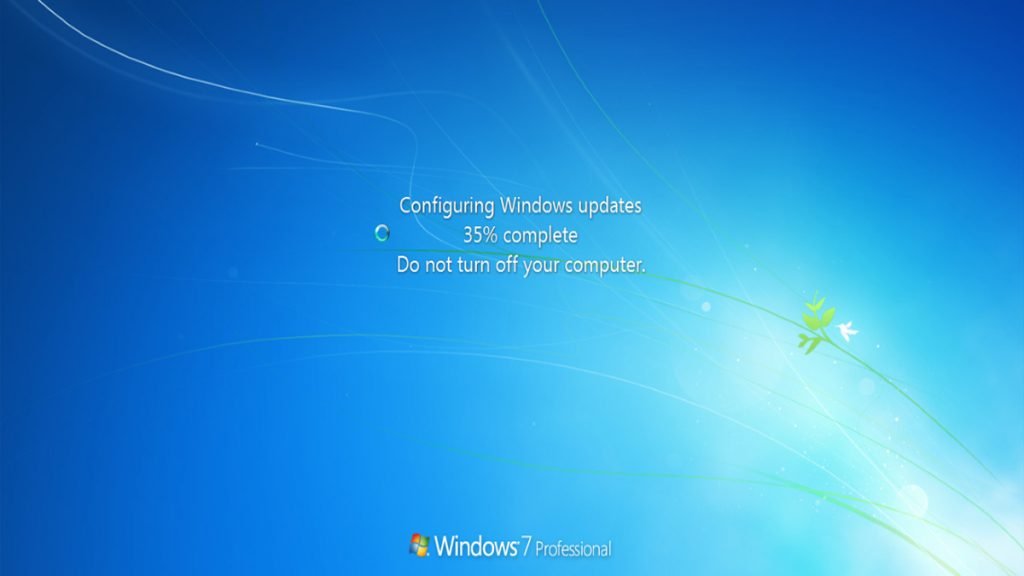
Once all the update files are downloaded then you will be asked to install them. To install them, you will click on Install Updates.
Here your system will install all the updates your system, and when the installation got completed, you will see Restart now option. Click on Restart now and your system will restart.
After the restart, you have a fully updated Windows 7.
There is also an alternative way to perform the exact same operation with this method. For this method, you will go to Start > Control Panel > System and Security > Windows Update. There you will find Check for Update, click on it and download Windows updates.
After the downloading got completed, you will select the Install Updates and then the installation will take place. Once the installation got completed then you will click on Restart Now. And that’s it, you have manually installed your Windows update.
For this method, you are going to check your system details first. Go to My Computer and select System Properties. There you will find all the required information about your system.
Here you will note down your Windows version. Then you will go to Windows Catalog.
Inside the catalog, you will type your Windows version in the search bar and press Enter.
You will be placed on a new page will all the updates for your Windows 7.
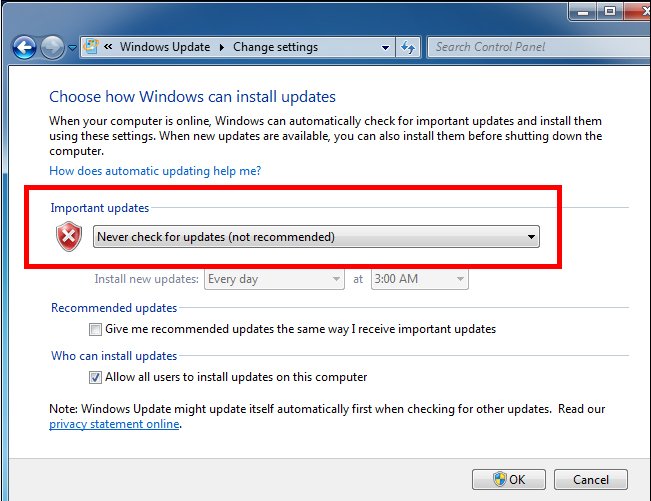
If you can’t update your Windows 7, even after clicking on Check for Updates in Windows Update then you have disabled the update options. For this, you are going to Control Panel, and there select the Windows Update.
Inside the Windows Update, you will select the Change Settings option. There you will enable Windows Update and select the Windows Updates option to either Manual or Automatic.
This is a common reason that users experience. And the main and only reason, you are experiencing the error is due to no access to the internet. By enabling the update, you will also fix the error.
What if you are not able to download any Windows Updates at all? For such occasions, you will need to go to Windows Catalog. Inside the catalog, you will search for your Windows 7 version and download all the required updates.
After the files got downloaded then you will run them as an administrator. You will select Accept to continue the installation phase.
In this step, you will select the Detect problems and apply the fixed for me (Recommended) option. Now click on Next and the updates will be installed on your system.
I am not getting any update notifications, or all the boxes are not checked, should I download and install the updates? Well first, you will need to understand two things. Microsoft provides two types of updates.
There is the important one and there is the not-so-important one. If you have disabled, the update notification or auto-update then you won’t see any update for your Windows. This is quite common, as most of the time, those updates can be annoying.
As for installing, you are recommended to install all Windows updates on your Windows. No matter important or not, you should update your system to the latest version possible. This will not only improve your user’s experience, Windows performance, and security but can also add new features and tools.
If you have disabled, the auto-update or can’t get any updates automatically then you are recommended to manually check for Windows updates.
Windows 7 wasn’t just great but a legendary Windows OS. The OS was released way back in 2009 and was the successor of Windows XP. Even though Windows Vista was released after Windows XP still the market was dominated by Windows XP.
After the release of Windows 7, the course of Windows OS has changed back to greatness again. However; users kept using Windows 7 even after the release of Windows 8, Windows 8.1, and Windows 10.
Even though Microsoft has mentioned time by time to upgrade their system to newer versions, still users kept using Windows 7.
During this time, Microsoft has fixed the support for Windows 7 till 2015. However; due to high demands, Microsoft was compelled to extend the support for Windows 7.
The extended support was till 2019 which was years ago. Now Windows 7 is no longer supported by the officials. This means that your OS is not back by the officials and using the system can put your data at risk. Instead of using the OS, you are recommended to use newer versions of Windows OS like Windows 10 or Windows 11.