Software Guide, Reviews & Download for Windows OS
SoftGets provides Windows Latest News, how to articles & Free Software download.
SoftGets provides Windows Latest News, how to articles & Free Software download.
SoftGets provides Windows Latest News, how to articles & Free Software download.
Creating a Virtual Machine in VMware is really simple you don’t have to do much once you have installed VMware Workstation in Windows 10, Simple, you have to open the VMware workstation pro Software, to Create a new virtual machine for the different operating system, and you can create a virtual machine for macOS Sierra, macOS High Sierra, macOS Mojave, which is the latest version of macOS by Apple, and even you can create a new virtual machine for different Microsoft Operating system, and Linux.
in this article, we will talk about creating a new virtual machine in VMware workstation pro as a windows user because we have installed VMware workstation Pro inside windows 10. we don’t target any special operating system in this article this guide will be all operating systems, in the next article we may focus on creating new virtual machines for specific operating systems because every operating system needs a different system requirement.
To make it simple to understand we will not talk more about Virtualization Software and creating new Virtual machines we directly start how to create a new virtual machine in VMware workstation pro inside windows 10.
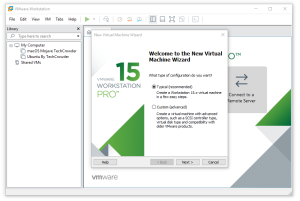
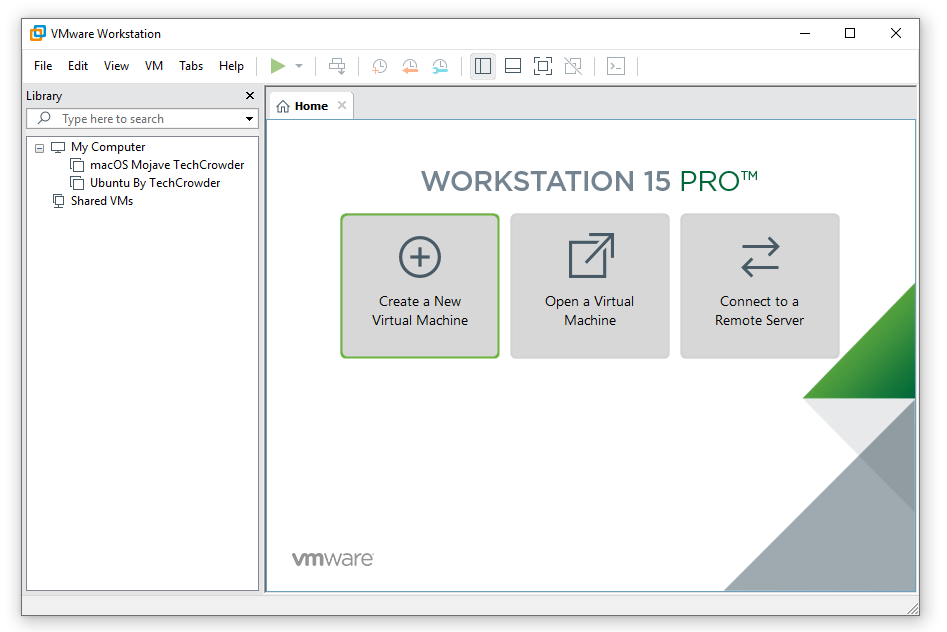
When you open VMware Workstation Pro, you have a decent look at VMware workstation Pro, as below image.
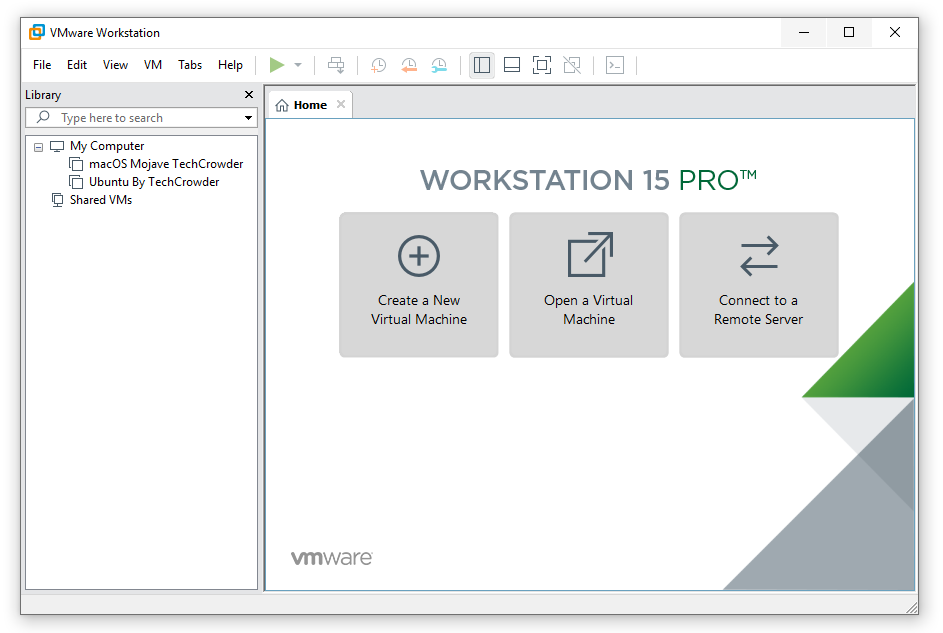
On the home page of VMware workstation pro, you will some options from them you have to click on Create a New Virtual Machine.
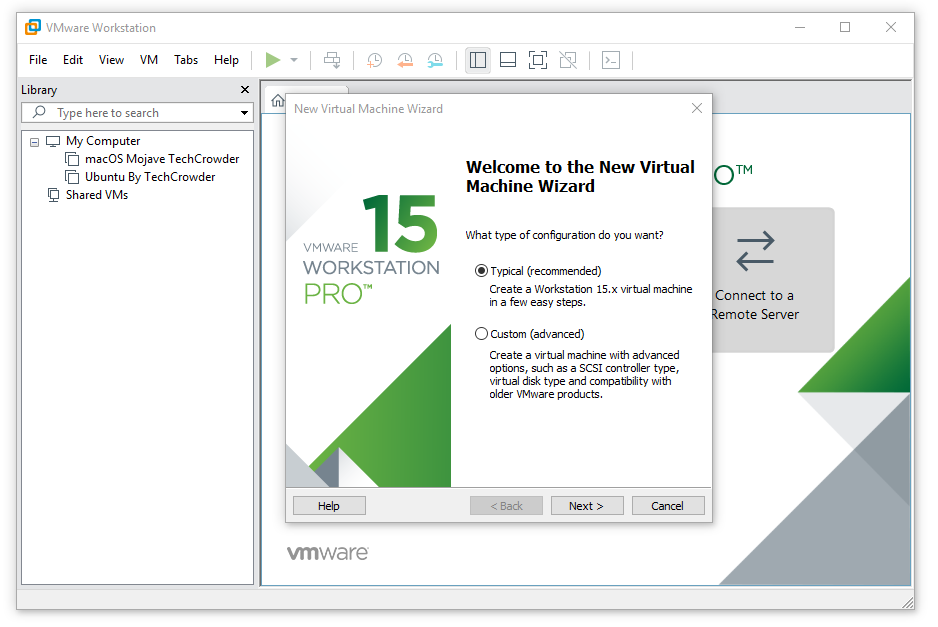
The configuration Process will start from this step, you have two types of configuration Typical and Custom, we are OK with typical configuration if you want to go with the more advanced custom configuration you can select that as well.
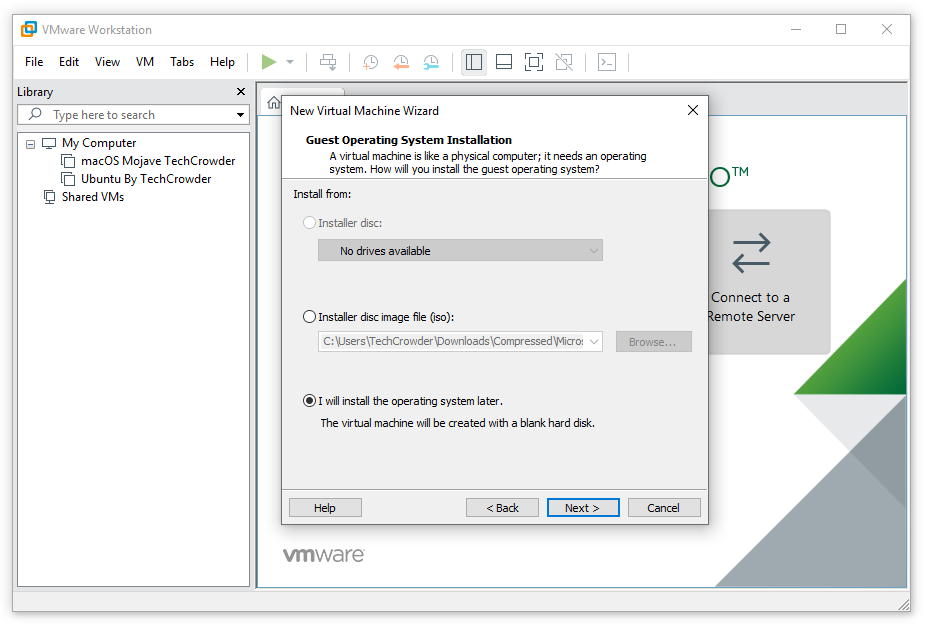
Guest Operating systems are those operating which you want to install in VMware Workstation Pro Virtual Machine, you can select an ISO file to be installed on this Virtual Machine. and even have the option to select the guest operating system later from the Virtual machine setting page.
We will attach the guest operating system letter to this virtual machine.
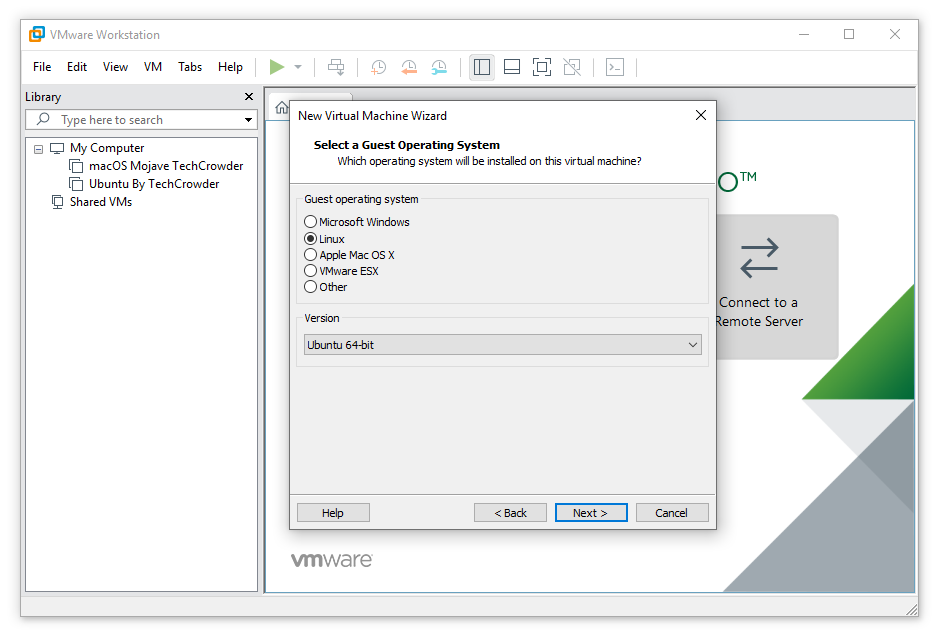
Now it’s time to confirm which operating system you want to install on this virtual machine, you have options for Microsoft Windows, Linux, Apple macOS, VMware ESX, and others. make sure to select the exact operating which you want to install on this machine.
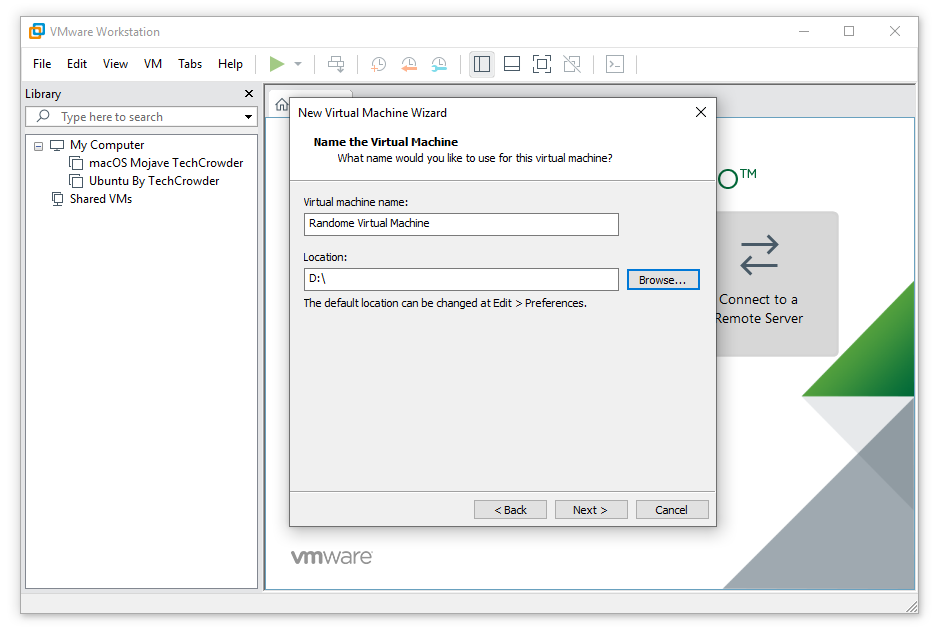
You have to provide a clear and desired name for your Guest Operating System that can help you in the future to access that easily, and confirm the location where you want to store this virtual machine, we suggest you store all your virtual machines out of C Drive on any other drive and folder.
Every Operating system will need a hard drive to store the operating installation file so here we will select a 40 GB Virtual Hard Disk for our Guest Operating system, you can store the guest operating system file on a single file or multiple files but it’s better and clear to select store virtual disk as a single file.

You are done with creating a new virtual machine in VMware workstation Pro in Windows 10, now you can customize this Virtual machine as your desire like to increase the hard drive space and increase the Ram and Processor for your guest operating system if you want to, click on customize hardware if not click on finish.

it was that simple to create a new virtual machine in VMware workstation Pro inside windows 10 now you can install any guest operating system in this virtual machine and enjoy using the different operating systems on a single physical computer.