Software Guide, Reviews & Download for Windows OS
SoftGets provides Windows Latest News, how to articles & Free Software download.
SoftGets provides Windows Latest News, how to articles & Free Software download.
SoftGets provides Windows Latest News, how to articles & Free Software download.
Despite not being the latest version of Windows, still, Windows 7 is considered one of the best. Windows 7 was released in six different editions, that includes; Windows 7 Starter, Windows 7 Home, Windows 7 Home Premium, Windows 7 Enterprise, Windows 7 Professional, and Windows 7 Ultimate. For those who are using Windows XP or Windows Vista and want to upgrade to Windows 7 without losing their data, then this is going to be the best method for them.
You can use the exact same method to upgrade to any of the Windows 7 editions, you want.
For upgrading to Windows 7, you are going to perform a few tasks. These tasks will enable you to make the operation smoother. This way, you won’t experience any sort of issue during the upgrade process.
You are going to create a bootable USB and insert it into your system. Then you will restart your system. Since we have changed the boot sequence, the system will ask to boot from USB by asking “Press any key…”. Press any key from your keyboard, you will boot your USB.
Now you will be placed in Windows 7 Setup window. From here on, you will install Windows 7. Click on Install Now.
Get important updates for the installation window will appear. You are going to select either the go online option or Do not get
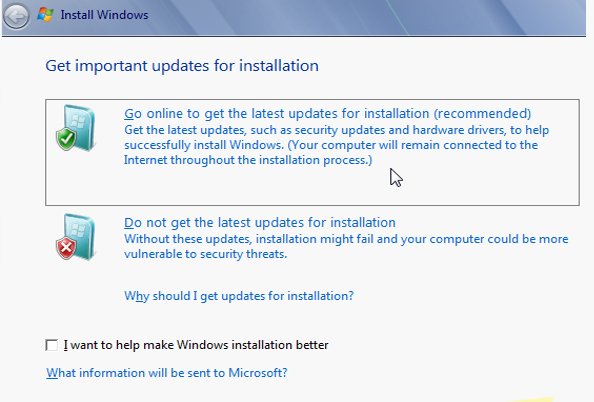
Get important updates for installation- go online, Do not get the latest update for installation. We would recommend you select the second option for skipping the update, and later on, you can update your Windows to the latest version.
Note: those who are selecting the first option are compelled to have an internet connection. Selecting the first option will download updates for your Windows.
Accept the terms and conditions of Windows by checking the I accept the license terms.
In this phase, instead of selecting the Custom (advanced) option, which is normally used to perform a clean installation, you will select the Upgrade option.

The installation will begin. The installation might take some time to get completed. Until the installation gets completed, you visit Softgets and check other articles. Or grab yourself a glass of water, you might be dehydrated right now.
Once the installation got completed then you will see a Setup if checking video performance.
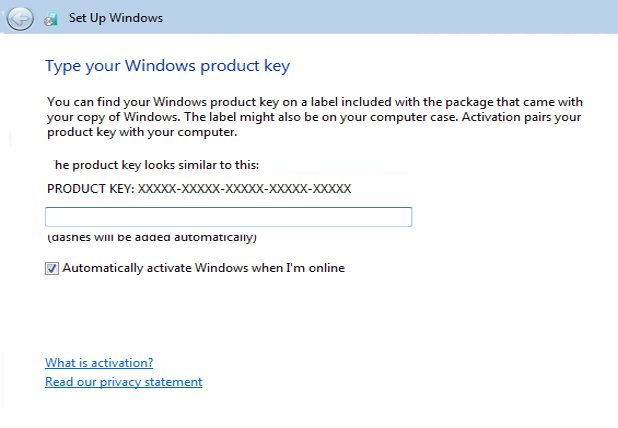
Now you will be asked for the product key. For the product key, you will need to either purchase from any store online or get one from the retail store. Just make sure that you have purchased one from a reliable source. As there are many frauds who are selling product keys that are not valid.
After the product key, you will be in Automatic Updates. Here you will either choose the Use recommended settings or Ask me later option. After selecting the update option, you will configure your system.
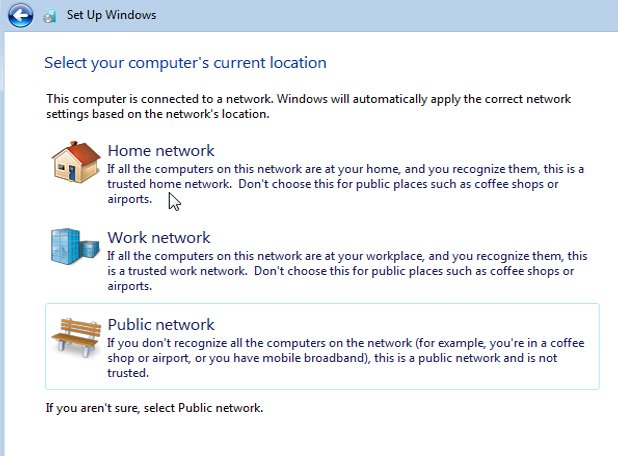
Configure the Date and time, select your computer’s current location, and much more. Now that you have configured your system, you will use your Windows 7.
What if you are using Windows 7 32-bit and want to upgrade to 64-bit? Start by checking which version of Windows 7 you are using. Go to My Computer and select System Properties.
Inside the System Properties, you will find System type, there you will find which version of Windows 7 you are using.
Before you continue any further, make sure that your system is compatible with a 64-bit system. For this, you can search on the internet and check your system compatibility. Or you will use a third-party application such as Windows 7 Upgrade Advisor.
Running 64-bit requires more spec as compared to 32-bit. This can be one of the reasons why you can run 32-bit but not 64-bit.
Check your system compatibility, if all the requirements are met then you will begin the installation. For upgrading to 64-bit, you will backup your data first. Then you will create a bootable USB of Windows 7. Once the USB is bootable, you will insert it into your system.
Now boot your USB.
Click on Install Now in Windows setup. Here you will be asked for downloading any newer update files of Windows. You can download it now or later by selecting the options provided.
Then you will agree with the terms and conditions provided by Windows.
Instead of selecting the Upgrade option, you will select the Custom (advanced) option. Then you will navigate, find and select your disk partition. Install Windows 7 on your PC.
NOTE: select Windows 7 64-bit edition instead of 32-bit to upgrade to 64-bit.
Performing clean installation and selecting 64-bit in Windows 7 editions, is the only way to upgrade from 32-bit to 64-bit. There is no tool or application to change the bit version of your system.
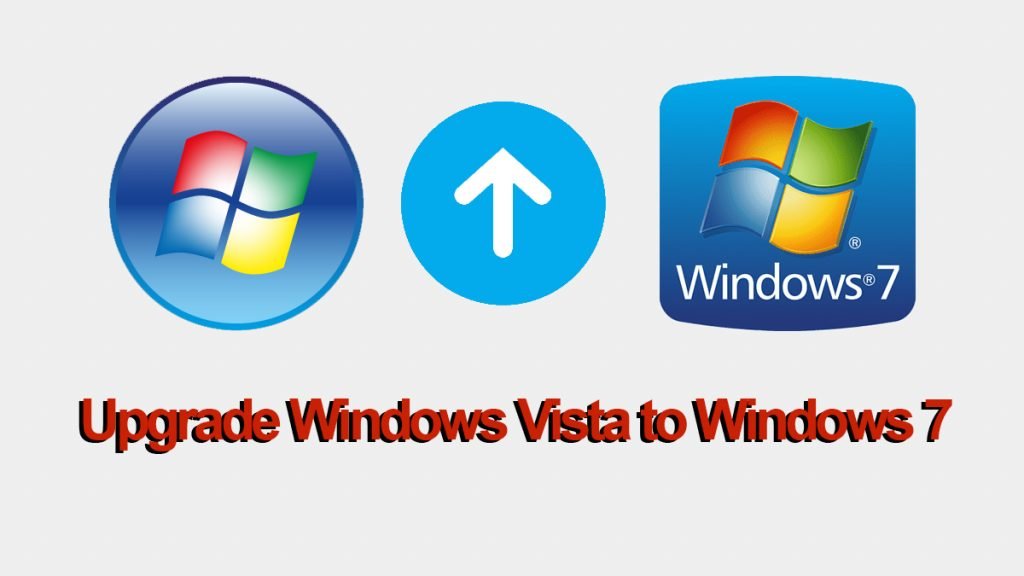
Yes, you can upgrade from Windows Vista to Windows 7 without losing any data. For this, you will select the Upgrade option instead of performing a clean installation. As in clean installation, you will delete all the files and programs on your system.
Whereas, on Upgrading, you will just change the Windows version while having the system files of the earlier version too.
To upgrade, you will need a bootable USB of Windows 7. Then you will boot it from BIOS, and perform the installation. During the installation, the only thing that you need to take care of is to upgrade your system. And that is, you have upgraded from Vista to 7.
For the bootable USB, make sure to download the original ISO Image. As there are many duplicates in the market, providing the ISO file of Windows 7. Having a duplicate file can cause errors or issues while installing the OS.
You are recommended to use the original ISO file, a fast USB pen drive with SSD as your system drive. Importance should be added to using SSD instead of HHD for the improved and efficient performance of your Windows. And that is it. If you got any questions related to the topic comment down.